
If you have
not read yet the first parts, please found them here: Part
1 , Part
2 and Part
3
Now we have
the Access database on the C:\Book\BookData – and the dll to load data is on
the C:\Book\BookObjects.
We will
create a Windows Forms project to see the data that is in the MDB file.
Right click
on the solution -and choose: Add => New Project => and choose Windows
Application. Put the name BookWin. A new form is created for you by
default.
Change the name from Form1 to frmPublisherList.cs, double
click on the file, press F4 to bring Properties window up front and change the
Text from Form1 to List of Publishers.
Now we must tell to the windows project to use the objects
project that we created earlier. Right click BookWin project in the Solution
Explorer, click „Add reference” and go to the Projects tab on the next window.
Double Click the BookObjects project.Compile(CTRL+SHIFT+B).
I must
found a way to copy the MDB in the same location as the executable, in order
that the path can function easily even the application will be deployed in
other paths. (Not every user will easily agree to deploy the application on the
same path as we do, C:\Book – maybe he wants to install in other places).
The
solution to be always in sync is to perform the copy automatically and
precisely when the build is complete.
Right click
on BookWin project from Solution Explorer, select properties (or find in menu
Project => Book Project Properties)
On the
“build events“tab you have a pre and a post build event command line
We will
wrote this code in the post build
copy
$(ProjectDir)..\BookData\*.mdb $(TargetDir)
That means
copy all MDB files from the following dir C:\Book\BookData (obtained as
following from the project dir (C:\Book\BookObjects\), the up (C:\Book\), the
to BookData (C:\Book\BookData)) to TargetDir (does no matter if debug or release)
Save and compile
(CTRL + SHIFT + B)
Now in the
C:\Book\BookObjects\bin\Release or in the C:\Book\BookObjects\bin\Debug must be
another copy of the MDB file.
Very good *
let’s write now the connection to the MDB. Right Click on BookWin in the Solution
Explorer – click Add => New Item => and choose “Application Configuration
File” ( default name :App.config – do not change this!) and put the following
lines:
<?xml version=“1.0“ encoding=“utf-8“ ?>
<configuration>
<appSettings>
<add
key=“DatabaseUsed“ value=“MDB“/>
<!– possible values : MDB, SQLServer–>
</appSettings>
<connectionStrings>
<add
name=“MDB“ connectionString=“Provider=Microsoft.Jet.OLEDB.4.0;Data
Source=|DataDirectory|\book.mdb;User Id=admin;Password=;“/>
<!– TODO : add for asp.net application the connection string with SQL Server–>
</connectionStrings>
</configuration>
Now it’s
the moment to load the records. We put code in the settings.cs file to be able
to switch connection at run-time:
public static DbConnection TheConnection
{
get
{
switch
(TheDatabase)
{
case
DatabaseUsed.MDB:
OleDbConnection oc = new OleDbConnection(ConnectionStringMDB);
return oc;
case
DatabaseUsed.SQLServer:
SqlConnection sc=new SqlConnection(ConnectionStringSQLServer);
return sc;
default:
// Maybe throw an error that config file has not been initialized with
// the database type ?
return null;
}
}
}
And to load Records:
public static IDataReader
Load(string CommandLine, DbConnection dbcon)
{
if
(!(dbcon.State == ConnectionState.Open))
dbcon.Open();
DbCommand
dc = null;
switch
(TheDatabase)
{
case
DatabaseUsed.MDB:
dc = new OleDbCommand(CommandLine);
break;
case
DatabaseUsed.SQLServer:
dc = new SqlCommand(CommandLine);
break;
default:
//TODO
: throw specific error that database type does not properly have been initialized
break;
}
dc.CommandType = CommandType.Text;
dc.Connection = dbcon;
return
dc.ExecuteReader();
return
null;
}
As you see,
we return a DbConnection no matter we use the OleDbConnection
or SqlConnection .
Now let’s fill
in the Load code in the ColPublisher file:
using System;
using
System.Collections.Generic;
using
System.Text;
using
System.Data;
using
System.Data.Common;
namespace
BookObjects
{
public class ColPublisher :
System.Collections.ObjectModel.KeyedCollection<string,Publisher>
{
protected
override string
GetKeyForItem(Publisher item)
{
return
“K” + item.IDPublisher;
}
public void Load()
{
DbConnection
db = Settings.TheConnection;
using
(db)
{
db.Open();
IDataReader
ir = Settings.Load(“select
IDPublisher, NamePublisher, SitePublisher from Publisher”, db);
while
(ir.Read())
{
Publisher
p = new Publisher();
p.FillObject(ir);
//TODO : add p into the
collection
}
}
}
}
}
We realize
now that the ColPublisher is not a collection where to add the new
publisher p. Fortunately, the .NET collection is enough big to contain many
collection.
Just look
into the System.Collections namespace, then into System.Collections.ObjectModel and into System.Collections.Specialized. You will find many more on the net
( for example, an implementation of a Set collection : http://www.codeproject.com/csharp/sets.asp)
We will
derive the ColPublisher from the System.Collections.ObjectModel.KeyedCollection<string,Publisher> .We must wrote how to generate the key for a specific Publisher -and what Key is better than the ID ?
protected override string
GetKeyForItem(Publisher item)
{
return
“K” + item.IDPublisher;
}
Now we can
wrote the Load method
properly :
using System;
using
System.Collections.Generic;
using
System.Text;
using
System.Data;
using
System.Data.Common;
namespace
BookObjects
{
public class ColPublisher :
System.Collections.ObjectModel.KeyedCollection<string,Publisher>
{
protected
override string
GetKeyForItem(Publisher item)
{
return
“K” + item.IDPublisher;
}
public void Load()
{
DbConnection
db = Settings.TheConnection;
using
(db)
{
db.Open();
IDataReader
ir = Settings.Load(“select
IDPublisher, NamePublisher, SitePublisher from Publisher”, db);
while
(ir.Read())
{
Publisher
p = new Publisher();
p.FillObject(ir);
this.Add(p);
}
}
}
}
}
And use it
from the Form :
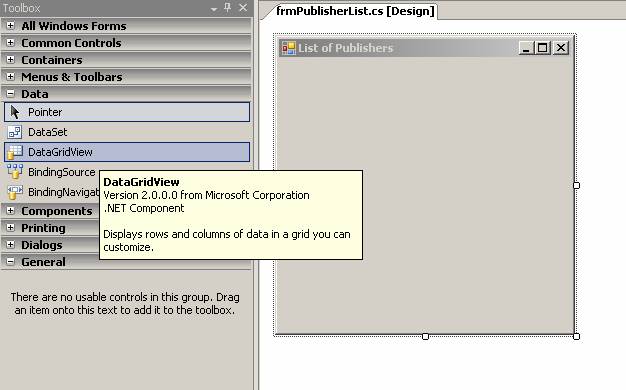
Double
click on the frmPublisherList.cs and drag a DataGridView to the form
Now configure
the data source:
Click on “(none)”
and select “add new data source”
In the next
dialog, choose “Object”
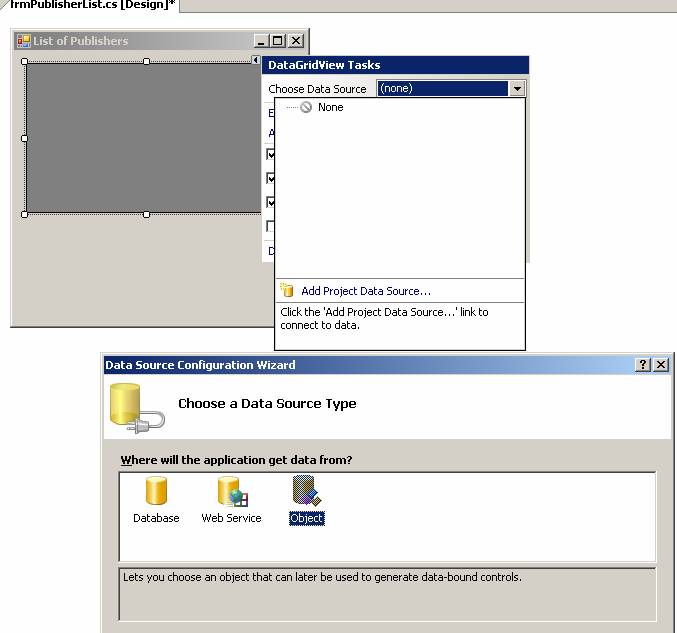
and press
next.
Now expand the
BookObjects node and choose “ColPublisher”. Press Next and then Finish.
To the form
is a new control added: colPublisherBindingSource – and the Grid has already the columns defined.
Now wrote
the data to load the data from the database:
Double click
on form, and you will find yourself in the Form_Load event :
private void frmPublisherList_Load(object
sender, EventArgs e)
{
BookObjects.ColPublisher publishers = new
BookObjects.ColPublisher();
publishers.Load();
colPublisherBindingSource.DataSource = publishers;
}
Now the
results – right click on BookWin – and select “Set as startup project”
Now press F5
* and wait to see the results. If the best case, you will see a form with no
data at all – and this is very correct – because of the fact that are no items
in the Book.mdb
In the next
lesson we will wrote code to do insert of a new Publisher and viewing him on
the form ( finally!)
Recommended
readings:
CSLA : http://www.lhotka.net/cslanet/ – a good framework to handle all the security,
scalability , binding and other issues ( and, most of all, free).